


amFilm Tempered Glass Screen Protector for Nintendo Switch 2017 (2-Pack)
$8.50


Product description
Add to Cart
Add to Cart
Add to Cart
Add to Cart
Add to Cart
Add to Cart
Customer Reviews
4.8 out of 5 stars 112,390
4.6 out of 5 stars 11,427
4.5 out of 5 stars 2,334
4.7 out of 5 stars 16,628
4.6 out of 5 stars 11,427
4.5 out of 5 stars 15,697
Price
$7.64$7.64 $16.99$16.99 $8.49$8.49 $7.19$7.19 $16.99$16.99 $6.94$6.94
Quantity in Pack
2 2 3 3 2 3


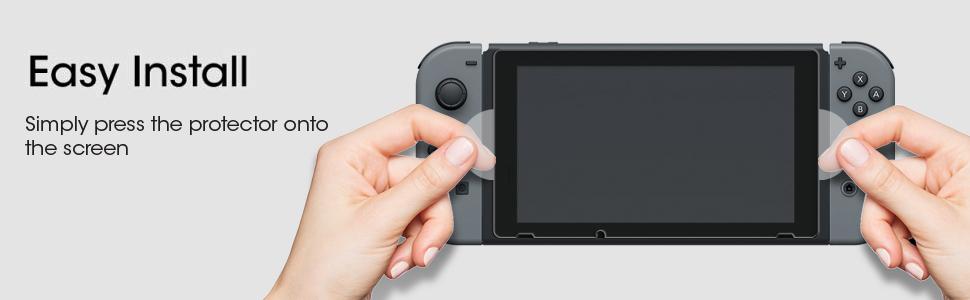

Specifically designed for Nintendo Switch 2017 6.2″ (2017)
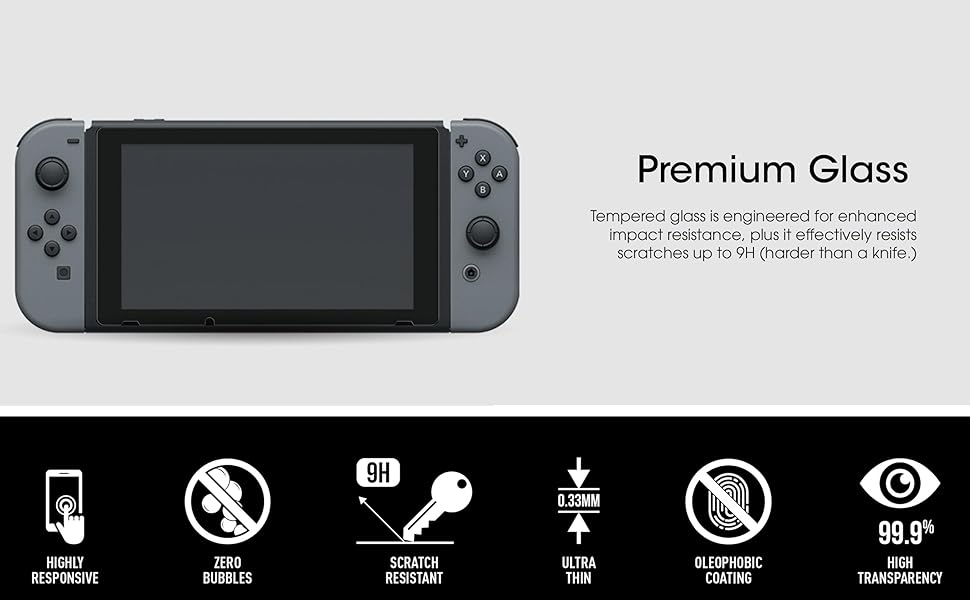
Ultra-clear High Definition with 99.9% transparency to allow an optimal, natural viewing experience
Ultra thin-0.3mm thickness is reliable and resilient, and promises full compatibility with touchscreen sensitivity
Highly durable, and scratch resistant – surface hardness 9H and topped with oleophobic coating to reduce fingerprints.
Includes: 2x GLASS Screen Protector, Wipes, Micro-Fiber Cleaning Cloth, Easy Installation Use Guide, Hinge Stickers
7 reviews for amFilm Tempered Glass Screen Protector for Nintendo Switch 2017 (2-Pack)


tea4me –
Solid Protection — Even From Itself!
So I’d gotten these since they happened to have the overall best reviews. Hoping that these were actually good I figured that the price wasn’t worse than I’d pay for a few coffees or maybe a meal out; I mean I wasn’t doing either since this was at the start of sheltering in place and going out for food was the furthest thing away from my mind. Since it came with 2 that was even better since I needed both for the two Switches that we had just gotten.So I installed both according to the instructions and honestly it was probably the easiest screen protector installation that I’ve had (I’m used to the plastic film kind that require the use of a card and some patience to remove the bubbles). To be honest I think that I spent more time making sure that the screen was dust-free and checking to make sure that the protector’s positioning was good before installing the protector than actually putting the protector onto the screen. Perfect fit, no bubbles, and nearly indistinguishable from the screen itself. So there it sat on the screens of the Switches for a year and a half. Then, one morning I tried brushing off a hair that wasn’t a hair.A small, partial crack had formed in the protector that soon propagated across the protector and then another came up from the bottom to meet it. I’m not sure what caused these cracks, but the system has had a few minor bumps (none to the screen directly) and perhaps the shock from those bumps was enough to cause cumulative strain and eventually spontaneous fracture (something that tempered glass is occasionally known to do). I was a little disappointed, but it gave me 18 months of solid performance through games with touch screen controls, a few bumps, and the Switch’s chassis likely lightly flexing as the buttons were frantically hit while in handheld mode—I’m not rough on my stuff, but the Switch would generally come with me from room-to-room and sometimes accompany me to doctors appointments. Furthermore, even with the hairline cracks the screen protector was still nearly invisible (when viewed directly; from the side it looked moderately horrifying if you didn’t know that the crack was in a screen protector) and didn’t seem to expose any sharp edges along the cracks. Of course I figured best not to push my luck with shattered pieces of glass and so I ordered a replacement.I was wholly expecting to have a difficult time removing the 3 large pieces—and one small piece—that the previous screen protector had broken into. Turns out that I was wrong. Apparently the adhesive layer of the glass is more than adhesive. In fact it appears to be a thin layer of plastic strong enough to holds the broken pieces together when carefully peeling it off of the screen! So the screen protector not only protects the screen from normal hazards, but it also protects the screen from broken pieces of the screen protector! It’s not just tempered glass it’s actually somewhat laminated—like how most windshields now have a film of plastic on the inside to keep the shards from flying free. Honestly this is better than I expected.
Joel Dalton –
Easy to install, fit perfectly, tricks included in review
I bought this protective glass for my Switch. I liked that it was a two pack, because I could practice with my brother’s system before attempting on mine. It installed perfectly. I did take a few extra steps I’d learned from other sources. I shut myself up in the bathroom, opened the shower curtain and ran hot water till it felt muggy. This supposedly grabs any dust that may settle on your already cleaned screen. I also washed my hands to remove excess oils. I left the screen protector in it’s foam sleeve till I was ready for it, because I’d have to align it with the film on and if dust got on it, it would transfer to the screen. I’d read reports of the microfiber cleaning cloth shedding, so used one of my own. I used their wet wipe to break down the oil he’d left on the screen. The recommend to wipe in circles. I did this over the whole screen and then wiped up the excess in straight lines. I dried with the microfiber. I did this twice and hit the one or two spots that were totally clean. I didn’t use their drying cloth for the same fear of shedding.Once my screen was perfectly clean, I removed the protector from it’s foam sleeve and lined it up. There are two simple ways of determining orientation. One is that the “Step 1″ tab is clearly one side and it allows you to remove the protective film from the screen protector. The other way is that there are (3) asymmetrical notches to align with the bottom of the switch screen.Here is the second way I deviated from the instructions. I used the tape hinge method. I used masking tape I had on hand, but I think painters tape would have been better. Don’t use duct tape as I think it would be hard to remove and leave a residue. I put a strip top and bottom, approximately 1.5″ wide and 4” long. You have to put them on the right side, because you’ll need to remove the protective film starting from the left. Have the tape on the screen protector, but not on the system. Align the protector to the best of your ability and then, while holding it in place with your left hand, use your right to press the tap onto the system itself and make sure it’s firmly attached to the system and the protector. I used a thumbnail to make sure it was pressed down well into the corner formed by the protector and system. Once this is done, lift the left edge of the protector, being careful not to touch the clean screen. Grab the “Step 1” tab and peel it away gently. Again, don’t touch the backside of the protector once the screen is removed. Once the rear film is removed, you can set it down on the system. The tape on the right hinges and insures that it falls back and is perfectly aligned as you had it before, preventing you from having to realign once it’s in place, which wouldn’t be easy to do.I simply set it down and it started sealing under it’s own weight. You could see the air getting pushed out from right to left. It was quite satisfying. Unfortunately, there was a slight bubble left at the top left of the screen. The included bubble remover is a cheap piece of cardboard. I used it, but a credit card would work just as well. It scratch the front film, but that’s what it’s there for. I got the bubble completely removed and then peeled off the front film to reveal a perfectly attached screen protector.I’ll have to try to remember to update this after constant use. I read that on some of the tighter docks, the width of the screen protector can cause it to rub. I’ve also read that because it’s glass instead of film, it can cause a slight issue with touch sensitivity. I noticed no issue with light transmission through it, which was a main selling point.I really like this protector so far, I’ll try to remember to update after some time and use have passed. It was easy to install and fit perfectly.
Chema –
Este juego de protectores son perfectos para Nintendo Switch, tienen la forma redondeada y las aperturas perfectas para las bocinas y sensor de la consola de forma que no obstruyan para nada su funcionamiento.A simple vista ni siquiera se percibe que la consola tiene una mica instalada y habla de la calidad y precisión con la que está hecha. Su instalación es muy fácil e incluye un pequeño folleto con las instrucciones, trae su paño de limpiador, un kit de limpieza húmedo y seco y una tarjeta quita burbujas que realmente no necesité para la instalación pues cayó perfectamente en su lugar y sin necesidad de aplicar presión.En cuanto al acabado, los colores se ven igual de brillantes que cuando no trae mica puesta y un buen añadido es el paño limpiador que permite remover suciedad de la pantalla fácilmente. Creo que le quitaré la mica vieja a mi otro Nintendo Switch para aplicarle la segunda mica incluida.
Steve –
Sticks well. No bubbles.Doesn’t hinder touch screen.
Prostak Guillaume –
Avec l’arrivée dans mon foyer d’une Switch, j’ai immédiatement voulu protéger son écran. En effet, j’avais lu des articles invoquant des défauts de série qui amenaient des rayures et autres problèmes, aussi me suis-je tout de suite mis en recherche d’une protection même si je ne suis pas fan de ce genre de produit.J’ai déjà eu l’occasion d’acheter des protections pour différents écrans par le passé, notamment pour téléphone portable. A chaque fois j’avais des bulles sous l’écran de protection après la dépose, des micropoussières ou d’autres cochoncetés qui venaient me rappeler à chaque instant que j’avais posé une protection sur mes écrans. C’est pour celà que je voyais ce genre de produit comme une nécessité mais également comme une contrainte.Je n’envisageais rien de plus lorsque j’ai passé la commande de ce kit de protection pour écran. Eh bah j’étais loin de me rendre compte que j’avais acheté une perle ! En effet, la pose est simple, les écrans sont niquels, je n’ai pas une bulle ni une poussière suite à l’installation ; c’est bien simple: je ne me rends même pas compte que j’ai mis une protection d’écran sur ma Switch.Cela va faire plusieurs semaines que j’ai installé le produit et à ce jour je n’ai aucune rayure. Je ne sais pas dire si c’est parce qu’elle protège bien l’écran ou parce qu’elle n’a pas été sollicitée, mais pour l’heure je ne me prononce pas sur la protection.Je recommande néanmoins pour la simplicité d’utilisation, la mise en place et le guide présent dans le kit.
Fred139 –
Personalmente, quando vado alla ricerca di questo tipo di prodotti, mi ritrovo sempre con tantissimi dubbi; anche dopo aver osservato moltissimi prodotti e aver letto moltissime recensioni, la situazione, molte volte, non cambia.Spero che la mia recensione possa aiutarvi a scegliere.Chi possiede una Nintendo Switch saprà, per averlo letto o per sentito dire, che il touchscreen è di plastica, piuttosto morbida, quindi incline ad una bella raccolta di righe, anche per i più attenti!Premettendo questo, viene naturale andare alla ricerca di una protezione per il nostro schermo, al fine di proteggerlo e goderci la nostra console il più a lungo possibile.Il prodotto in questione include all’ interno del suo pack tutto quello che serve per l’ applicazione:- 2 Schermi in vetro temperato;- 1 salvietta umida e una salvietta asciutta, rispettivamente per pulire e asciugare lo schermo prima dell’applicazione del vetro temperato;- 1 panno in microfibra;- Adesivi per la rimozione della polvere;- Istruzioni, in inglese, ma ci sono le vignette ;).Io le ho installate su due switch, e devo dire di non aver avuto problemi su nessuna delle due. L’ installazione è stata semplice grazie alle due ali laterali che aiutano il posizionamento del vetro. Non sono rimaste bolle e nessuna imperfezione.Altra cosa che vorrei sottolineare è che il vetro è di dimensioni perfette! Se posizionato bene, sembrerà quasi uscita di fabbrica così! Davvero eccezionale.Conseguentemente non provoca nessun disturbo nell’ inserimento della Switch nel Dock di ricarica.Il rapporto Qualità/Prezzo è straordinario. Ho pagato 8,99€ per due vetri temperati con tutto quello che serve per l’applicazione.Insomma, valutando quella che è stata la mia esperienza non posso che consigliarvi di acquistarla senza perplessità!
C M –
He recibido hace unas horas este pedido, me he dispuesto a instalar y he quedado tan satisfecho que voy a comentaros aspectos y mostraros su contenido. Para empezar la caja en la que viene es de un material muy resistente para evitar que el contenido sufra golpes y nuestros cristales templados puedan venir rotos (vienen 2 unidades).El contenido que viene en su interior es:2 x Cristales templados para Nintendo Switch (adaptados a borde de pantalla negro, con los recortes necesarios para cámara y sensores.2 x Kit de toallita humeda y toallita seca para limpiar la pantalla y secarla a posteriori.1 Juego de 6 pegatinas para quitar motas de polvo del cristal (no he necesitado usarla)1 Toallita de Microfibra1 Tarjeta rígida de cartón para desplazar el aire debajo del cristal si fuera necesario.1 Instrucciones de instalación algo genéricas y en ingles, fácil de entender siguiendo los dibujos que nos guían.El proceso de instalación es bien sencillo de hecho viene un cartelito que te advierte que limpies la pantalla perfectamente para evitar tener burbujas por motas de polvo.Cada cristal viene en una funda de plástico blanco acolchado para que permanezca intacto y aislado de cualquier otro producto de la caja.Un detalle que me ha gustado mucho es que el cristal trae la típica pegatina con el numero 1, para quitarla y ponerla por ese lado contra la pantalla, pero es el otro lado el que tiene el sistema interesante, pues nos ayuda a colocarlo sin necesidad de tocar el cristal en ningún momento, evitando así manchar la pantalla que acabamos de limpiar. Se trata de 2 asas laterales con las que guiar el cristal a su posición correcta, una vez colocado y terminadas las burbujas retiraremos este plástico y tendremos la consola lista para su disfrute.Sobretodo paciencia, manos bien limpias y secas, y hacerlo en un entorno en el que no tengais polvo, viento o nada que pueda mancharos o la pantalla o el cristal a la hora de pegarloSi aún habiendo quitado las burbujas seguís viendo que hay como pequeños rastros de pegamento detrás que no llega a ser aire y no se va, no os preocupéis.. el pegamento que llevan estos cristales en unas horas se amolda a la superficie dejándola cristalina totalmente, este efecto es mínimo y apenas se aprecia.Como única pega que le puedo poner si es que lo fuera para alguien, es el grosor del cristal es un 0,33 mm , quizás una versión en 0,25 nos dejaría mas fina la consola y entraría en el dock sin problema alguno. El principal motivo de ponerle un cristal templado es primero no manchar o rayar la pantalla original y segundo que el dock que diseño Nintendo no pueda rayar los laterales de la pantalla, aunque sea en la parte no visible de esta (bordes negros).Sin duda recomiendo estos cristales y por el precio que tienen tienes 2 unidades. Sin duda un acierto